|
Recent Entries to this Blog
Overland Park Arboretum & Botanical Gardens
Posted: 27 Aug 2008 Posted: 26 Aug 2008 Posted: 18 May 2008 Posted: 29 Apr 2008 Posted: 27 Apr 2008 All Entries |
Fairy Garden In a Planter
Here's my first Fairy Garden that I've done. I'll do my best to explain what I've done and how I did it. My Fairy Garden is in a planter that's made out of concrete and measures 30", its a big huge bowl planter. Since it will stay outside, everything I've made or bought..I've sprayed with a high gloss laquer hoping it will all hold up better to the elements. Crossing my fingers. I started this project about 4 weeks ago and it's been alot of fun. I was inspired after going to a Flower Lawn & Garden show in February and I saw a small Fairy Garden done up in a bird bath. I searched the net and got ideas and then I was off and running in full Fairy Mode. While it was still real cold outside I started on things I knew a Fairy Garden needed. Structures! I had a few old orchid pots in the garage so I used one of those. This pot is a 9". I had little stones also and went and bought a bag of sheet moss. I stepped into the front yard and picked up pieces of bark that had fallen off one of my trees that has seen better days. For adhesive I used Goop 'marine' since I wanted waterproof. That got expensive so I do plan to find another adhesive that I think will hold up outside but will be cheaper than 6 bucks a tube. First I glued stones inside and outside of the pot. Then glued pieces of moss to fill in the gaps. I wanted to use the bark for the roof. I felt that the roof might need more than moss to be glued to so I used pieces of a broken clay pot for the roof base. After glueing the bark on, when it was set enough, I tucked tiny pieces of moss in the cracks. After everything was dry I sprayed several coats of laquer over the entire pot. I also did a little step for in front of the pot which is just a piece of bark glued onto two stones. 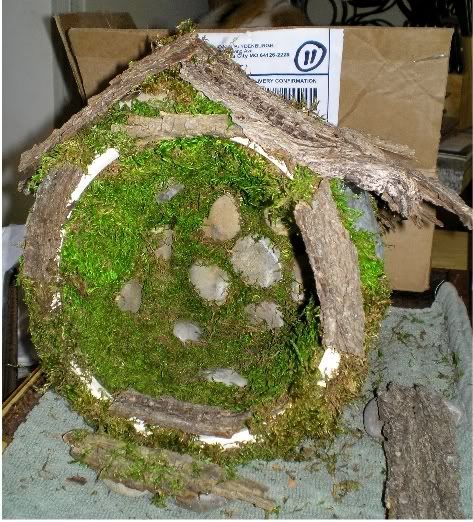
I wanted a Pot O Gold to go in the middle of the planter. I found a clearanced planter at Michaels for $3 and bought a big bag of gold gems. I already had a small water fountain pump. I buried the pump in the bottom of the planter, put a few rocks on top to hold it down, added gems..wahlah a Pot 0 Gold. I have electricity by my Fairy Garden and I'll put this POG down into the dirt. 
I start wondering how I'd cover the cord that's coming out of the POG. I made a bridge..same concept as the step only bigger. 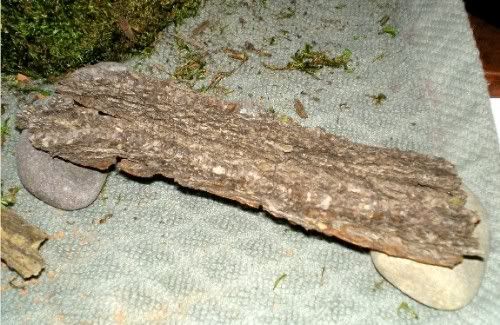
My Fairy Garden was supposed to be built by the Fairies so I had my 4yr old Granddaughter come over to plant The Pink Magic Mushroom! This was fun and she bought it hook line & sinker. She sprinkled Fairy Dust all over this so more mushrooms would grow. Where there's mushrooms..the Fairies surely live. I've also discovered I'm quite capable of telling Fairy (tall) Tales. 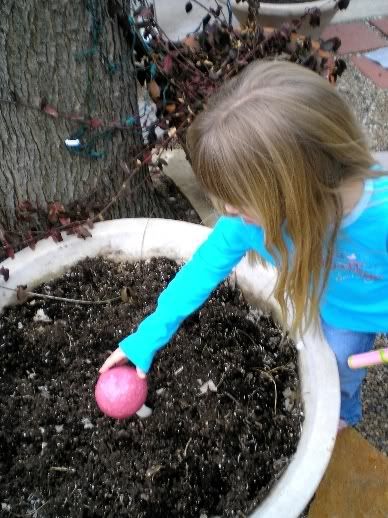
Finally I could go out and start putting the Fairy Garden together. I had to show her a picture of the magical things happening. Her magic mushroom turned into 5 mushrooms and a Pot O Gold. I got to test the water feature buried in the dirt theory and hide the cord : ) 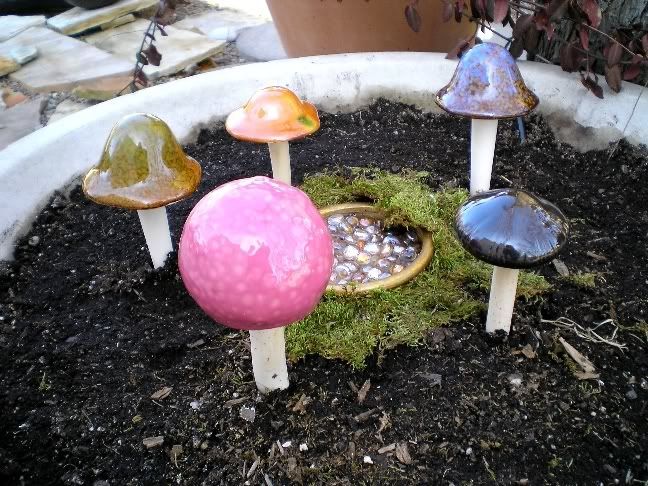
Spring cant come fast enough for me. Lowes was putting out their little pots of spring bulbs so I picked some up and a couple Dianthus. (Trying to do alot of perennials) I also put my Fairy Hut out and found a piece of iron edgeing that had a hole in it. I placed that in front of the hut. 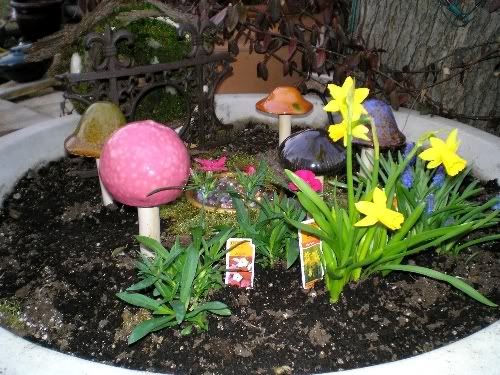
I found this little house at Hobby Lobby for $4 when they had their bird houses half off. I dont know about anyone else, but I find it hard to pay full price at HL when they always run things half off. All I did to this was spray it with laquer and I attached a small triangle hanger on the back. I have it hanging on the tree and I made a ladder out of a few small sticks. After I glued the rungs on I wrapped each rung with small jewelry leather and glued the knots. Sprayed it too with laquer and now there's a tree house. (I later moved the tree house up a few inches) Fairies are good at moving and arranging. 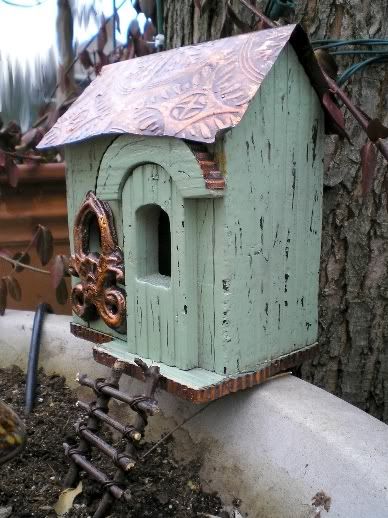
I'd decided that the Fairy Hut was to big and took up to much valuable Fairy room so I made another one out of a smaller 6" pot I had. I added some pine cones to this one. It fits much better. 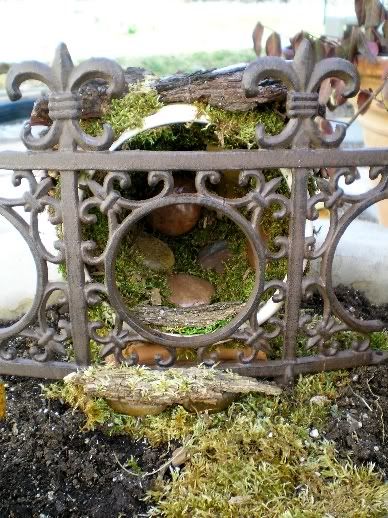
Doesnt it seem like the plants will never get to the garden center? Kinda like Santa Claus..Christmas cant happen fast enough. That's all I was waiting on to finish this up..was plants! The other day I was driving by Home Depot and saw the flower trucks! This was truly better than Christmas. Most people would say.."oh it's too early" but not me. I was in heaven. I planted it all up today and bout froze to death doing it but I was as happy as a pig in..... 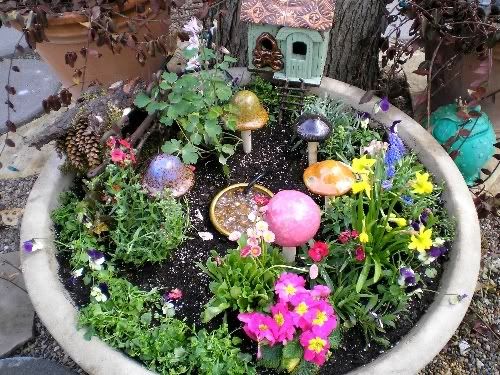
What I planted and hopefully wont have to replace; English Ivy x 2 Angelart Nemesia Primrose Grape Hyacinth x 2 Provence Lavender x 2 Daffodil (dwarf) x 2 English Daisy Columbine Dianthus Viola x 8 Lobelia x 8 Snap Dragon x 4 I also totally finished the Fairy Garden today with more moss and tiny gravel for the paths, along with a few ornaments. There was even a Fairy sighting! As soon as the sun shines I will take more pictures of the finished planter and get them posted. Last edited: Sun Mar 30, 2008 5:09 am This blog entry has been viewed 10481 times
You're reading one of many blogs on GardenStew.com.
Register for free and start your own blog today.
Your Fairy garden is so very pretty.I just love it.You did such a good job on it.
I love it. The little garden really looks magical, and I'm sure your little granddaughter will agree. Well done!
Well done, I really like it.
You've done a fabulous job with your fairy garden Joann! My daughter just looked at your photo's and asked if WE could make one of those!
Joann wonderful job gal. I will have to show this to the granddaughters when they come today. Thanks for sharing. Really cute.
Very cute. You did a good job.
I knew you'd have some great pictures fo us, but WOW! I love it so much, especially the fairy hut. You truly have an eye for the whimsical and the bargain!
Lovely.
Login or register to leave a comment. |
Entries by Category
All Categories
|

