|
Recent Entries to this Blog
Project Tomato - It's Yummy
Posted: 25 Oct 2014 Posted: 03 Oct 2014 Posted: 23 Sep 2014 Posted: 19 Sep 2014 Posted: 07 Sep 2014 All Entries |
LUCKY DAY!!After having all the components for the grow tank ready to be assembled, I did not proceed to assembling them. 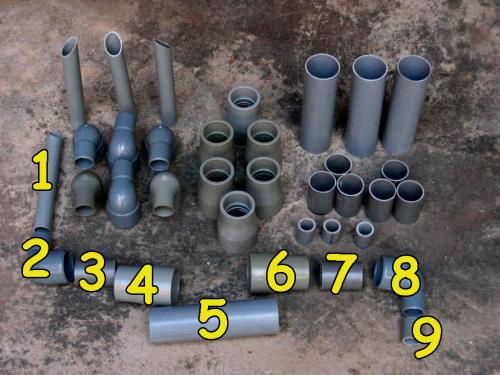
Components ( photo / image / picture from KK Ng's Garden ) The components from 1 to 4 is inside the grow tank and 5 is the connector to the outside connecting 6 to 9. The flexible tube is connected to 9 which has a smaller internal diameter than 9. This is necessary in order to bring about the Venturi effect thus starting the siphon. I did not proceed with the assembling because I was wondering what I should make use of in making the stand for the grow tanks, I can't have them on the floor because the return depends on gravity. I need to get the stand up also to visualise how the feed and drain plumping should be done. Checked my stash of lumbers but none were suitable so ........... for the last two days whenever I went out, I would keep an eye out for any discarded timber in any form which I could make use of. I was really reluctant to go to the timber yard to just buy a couple of foot run of the beams I needed because they would charge a exorbitant price for the transport or I had to wait at least a couple of days before they are delivered. So that was my last choice. Yesterday was my lucky day, while delivering some groceries to my mum-in-law's place, I saw what looks like a pile of discarded bed frame in the rubbish dump of a school which is just about 30yards from her place. I was delighted to see the lumber of the bed frame is still in great condition and on closer inspection, one of the legs had broken off. 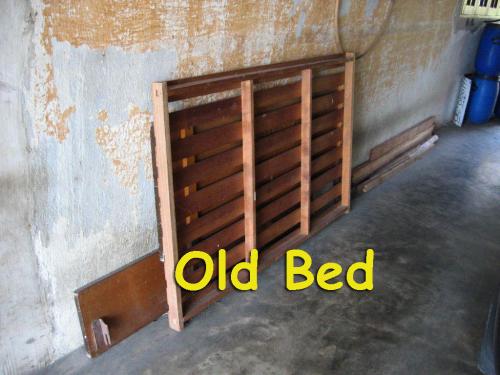
Old Bed ( photo / image / picture from KK Ng's Garden ) Piece by piece I took it to Becky's mum place for safe keeping because I had to return home to get the Old Chariot to transport my precious find. Becky's mum was surprised to see me taking the old bed frame into her compound because she just got someone to throw it out earlier. Looks like it is just a simple case of one person's rubbish is another person's treasure! 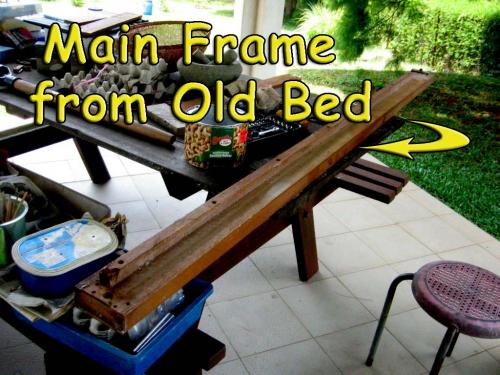
Recycling ( photo / image / picture from KK Ng's Garden ) This morning after having removed the unnecessary parts from the main frame of the bed and having it sawn to the required length, I was able to setup the layout of the system. Having anticipated the weight the racking had to bear, I decided to make use of the concrete blocks for the pillars and the wooden beams as the cross-member. I have no idea what the concrete blocks were for but every piece have a date on it and where they came from. They were left here by the previous occupant of the house I think. 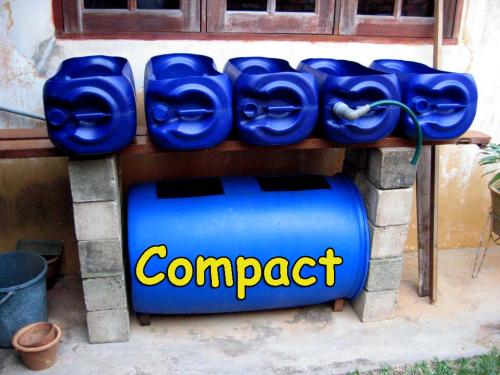
Compact Layout ( photo / image / picture from KK Ng's Garden ) The compact layout was my first thought but it did not look stable enough. Not having a center support for the cross-member also worried me because furniture wood is not exactly very strong. 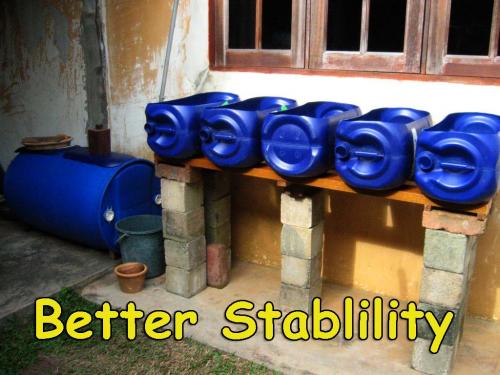
Acceptable Layout ( photo / image / picture from KK Ng's Garden ) This layout is much more stable and it is easier to work with the fish tank if need be. Since I have the space, I guess I'll stick with this layout. Cost of grow tank stand - $0.00 Next - GROW MEDIA This blog entry has been viewed 491 times
You're reading one of many blogs on GardenStew.com.
Register for free and start your own blog today.
It really is magnificant, KK....really.
Fantastic KK,
I love your descriptive photos KK.
Thanks Sojerd.
Login or register to leave a comment. |
|
