|
Recent Entries to this Blog
Filling the Newspaper Pots. A Soiled Topic!
Posted: 09 Feb 2007 Posted: 09 Feb 2007 Posted: 08 Feb 2007 Posted: 06 Feb 2007 Posted: 05 Feb 2007 All Entries |
Jungle Joy's BlogI stuff plants in every available space, people have often told me that my garden is like a jungle. I take that as a compliment!
Filling the Newspaper Pots. A Soiled Topic!
Category: Garden Gab | Posted: Fri Feb 09, 2007 8:57 pm Qaulity results come from quality beginnings! 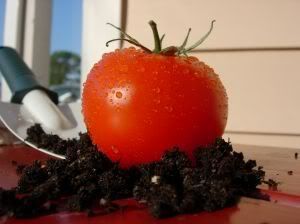
Now that we have our handy dandy newspaper pots for starting our seeds - (you can review that tutorial here), we move on to our next soiled topic. What to fill our pots with! NOTE: There are other ways to start seeds including using straight vermiculite or planting with peat pellets. As well, there many types of containers, but the purpose of this post is to continue on with filling our newspaper pots and getting ready to plant Starting seeds indoors can be ridiculously simple, but sometimes it becomes horrendously frustrating. We have all had seeds that refused to germinate and some that germinated just fine, but died off shortly thereafter. The first ingredient for success is the seed starting mix. There are a plethora of mixes and brands out there and most of them are quite good. You can even mix your own as needed. Its really easy to do. When selecting or mixing seed starting medium, you want to keep in mind that a seedling is just a baby. It is small and much more fragile than a full-grown plant. It has food reserves for its early growth, but moisture is at a premium and must be constantly provided and yet you don't want to drown it. Our infant plant does indeed need to be babied if it is to reach its full potential. You don't wrap a baby in a big, heavy, scratchy, dirty, old wool blanket. You use a soft, light, clean, wrap to give your baby a pleasant and safe environment. Treat your seeds the same way. 
A seed starting medium needs to be completely sterile, anything less and you are likely to encounter soil bourn diseases that will cut down your sweet babies before they get a chance to really live. Especially dampening off fungus. Oh you know what I'm talking about - your sweet little seedlings are all green and new, then suddenly - POOF - they are lying limp and dead. You stare in disbelief and wonder what you did wrong. Keep things light. Avoid using potting mix for your seedlings, it is far too heavy. The seedling has to struggle up through the soil to reach the light and it needs to be able to extend its delicate new roots through the medium to establish its future feeding mechanism and a firmly anchor itself in position. You also need room for good air circulation and heavy soil has less space for oxygen. Your mix also needs to be able to hold an adequate amount of moisture to prevent the seedling from drying out. This is a very real danger for a small undeveloped plant. On the other hand you don't want to saturate your plant either, that might promote the growth of unwanted fungus or bacteria. What you want is a growing medium that is light-weight, allowing the plant to breathe and grow easily, but at the same time will hold the moisture that your plant needs to thrive. 
Sound like quite the balancing act, doesn't it? And that is exactly what it is. Almost any good commercial seed starting medium will do. Most of these are artificial, they contain no garden loam and provide a safe sterile environment for your seedlings. Seed Starting Mix Recipes: You can even mix your own seed starting medium. A simple formula for this is: 1 part perlite 1 part peatmoss 1 part ground or milled sphagnum moss You can get all these ingredients in the garden section of most department stores or your friendly neighborhood garden center. If you absolutely insist on a making your own soil based mix, the following is a good recipe: 1 part loam 1 part leaf mould or peatmoss 1 part sand You will need to sterilize this mix. Sterilizing will kill off any pests, including eggs and larvae too small to see. It will also kill any bacteria, weed seeds and fungi. Place the soil in a shallow baking pan and add one cup of water for each gallon of soil. Bake at 200 degrees Fahrenheit for two hours. Cool and let the soil stand for 24 hours before using. So now you know why it is not a good idea to try bringing soil in from outside in your garden, toss it in a pot, plant your seeds and hope for the best, right? Excellent - now go forth and reproduce! Plants that is. This blog entry has been viewed 9129 times
Borage and Zone 8b
Category: Garden Gab | Posted: Fri Feb 09, 2007 2:49 pm For those of you who want to know. You know who you are (wink, wink, nudge, nudge)! :) I did find this quote from a lady in Florida zone 8b: "Borago officinalisÃÂ - Borage Easy to start from seed.ÃÂ Cold hardy annual that reseeds itself.ÃÂ I started it, direct sowed, in January, it's been blooming since March.ÃÂ A host plant for the Painted Lady.ÃÂ Also attracts bumble bees.ÃÂ Doesn't do to well in the Fla. summers, though.ÃÂ It's already "done" in June, so I pulled it up to make room for something new.ÃÂ I might plant ONE plant this year - it is a favorite of bumble bees." This is the website that the above quote came from: http://melanys.tripod.com/garden.htm Looks like it will do well as an early season plant in your zone. Useful as a filler as you wait for slower growing plants to mature. I've never known any nursery to carry them as a bedding plant. Probably because they develop a long taproot and don't like being transplanted. Though I have successfully transplanted very young seedlings every year for the last 3 years. Being such a quick growing annual you will need to look for seeds. Not all garden supply centers may carry it, if they do it will be grouped with the herbs. You can also order it online from Johnny's Select Seeds. $2.50 US. per package http://www.johnnyseeds.com/catalog/subcategory.aspx?category=205&subcategory=214 Like I said very easy to grow, matures from seed in just 5 to 6 weeks. Hope this helps! Jungle Joy a.k.a. Joella This blog entry has been viewed 1471 times
Borage Banter
Category: Garden Gab | Posted: Thu Feb 08, 2007 9:43 pm I got a great deal of feedback on the picture of Borage that I posted on my last blog. Let me respond to those who expressed an interest in the plant. Borage is my favorite weed. No really, it is. By definition, a weed, is any plant growing where it is not wanted. Believe me when I say that Borage is indeed a weed. It will grow practically everywhere and anywhere. I planted a package of the seed four years ago and I haven't had to buy another package since. Not only does it seem to grow everywhere, it reseeds like mad. I even get new borage plants in mid-season. In the spring I locate likely candidates, wherever they happen to be thriving, scoop them up and plant them just where I want them. The rest I just treat like garden weeds. I would not say they are pest, they make my life really easy - I can stick them anywhere I need a filler plant and they will happily oblige with quick growth that will quickly reach a height of about 24 inches. They are also attractive and unusual. Brilliant blue star shaped flowers nod in the breeze and bloom all summer long. Though the blossoms are small, they are showy and highly attractive to bees. Even better the pretty little flowers can be candied and used to decorate cakes as an edible garnish. They can also be dried to add color to potpourri. The leaves are fairly plain looking and are covered in hairy fibers, giving them a fuzzy appearance. The young leaves can be added to salads.Older leaves can be chopped and added to soups and stews during the last few minutes of cooking. Some people cook them with cabbage leaves (two parts cabbage to one part borage.) Borage is rich in minerals, especially potassium. A tea made with borage is said to help reduce fevers and ease chest colds. A nifty plant all round, ridiculously easy to grow. If you want to get children interested in gardening - let them plant some borage. They will be enchanted and delighted with this quick growing herb. This blog entry has been viewed 1269 times
Wow! The "Stew" is alive!
Category: Garden Gab | Posted: Tue Feb 06, 2007 4:43 pm Yes Gardenstew is alive with great people. I got such an amazing response from everybody who read the newspaper seed pot tutorial. I am so enjoying myself. Thank you all!!! Hmmm... now the pressure is on. What other useful tidbit can I share? Stay tuned my fellow "Stewies" I'll see what I can "cook" up. Beware I often fall prey to the evil pun beast. Hope is alive again and lives in my preparations for the garden! Yo Ho! 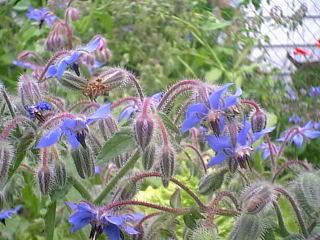
Borage nods in a soft summer breeze - in a past life, but soon, yes soon. Last edited: Tue Feb 06, 2007 4:45 pm This blog entry has been viewed 1245 times
The dreams continue, reality is a nightmare. Make seed pots!
Category: Garden Gab | Posted: Mon Feb 05, 2007 7:40 pm I am dreaming of what my garden should look like. It should look like this: 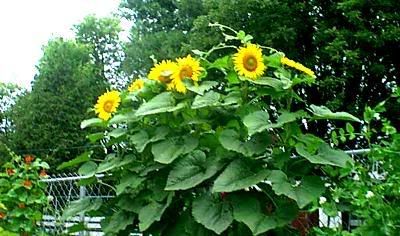
The reality, the nightmare that I can't come to grips with, is that it looks like this: 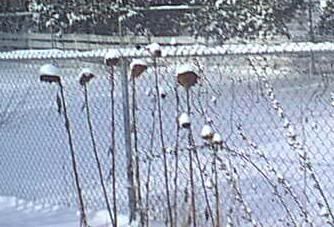
So to distract myself from the dissmal reality of the backyard I decided to make some seed starting pots. From newspapers no less. I am on a budget as it were, and it never hurts to recycle a bit. If you've never done it I have posted pictures and instructions below. Follow along and save some money and some trees! Okay so this is what we want to end up with: 
To start you will need a single sheet of newspaper. I am using one that is from a little local press, it is somewhat smaller than average, but you can use whatever you like. Lay it out lengthwise, like in the photo below. 
Now fold the paper upwards, in half, like this: 
Then fold it once more to get a nice long strip that is several layers thick. See the photo below. 
Now you need a can. I am using a 5.5 ounce/156 ml tomato paste can. This type of can makes a fairly average sized seed planting pot. You can make bigger pots by using larger cans. Condensed soup cans also work well. You may want to use two sheets of newspaper for larger pots. You might also need to adjust the width of the strip for the larger sized container. 
Now take your can and lay it on the strip of paper, but leave enough of an overhang that you can fold the paper accross the bottom of the can and seal it up. This will form the bottom of the can. 
Now tightly wrap the newspaper strip around your can. Like so: 
You should end up with something that looks like this: 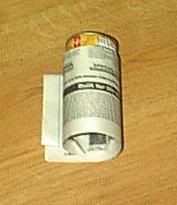
Now fold in the paper around the bottom of the can. To really set the creases, place the can on a hard surface, press down fairly hard and twist or rub it back and forth. To seal the edge, use a small strip of tape on the seam near the top of the pot. 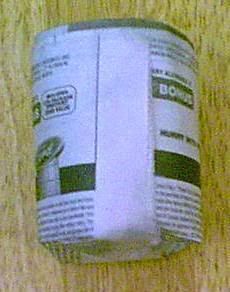
The bottom of the pot will look like the photo below, use a small strip or two, of tape to secure it. Slip the can out after you have taped the side seam and bottom flaps in place. 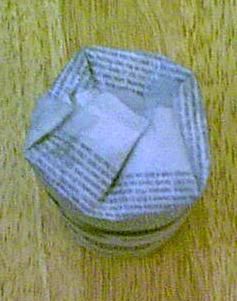
Ta Da! You're done and your seed planting pot should look like the one in our last photo. Quick, easy and ecconomical. 
Your pot is now ready to fill with soil and plant as normal. Set the pots close together in a tray and treat as you would peat pots. Yes they will hold up just fine. When planting time comes you can pop the whole pot right in your planting hole, the newspaper will break down in the soil. You can remove the tape from the bottom, open it up and cut away the excess with garden shears, if you like. This will give the plant roots easy access to the soil. Hope some of you find this useful. Last edited: Tue Feb 06, 2007 4:30 pm This blog entry has been viewed 4352 times
Dreaming of Spring in the Garden.
Category: Garden Gab | Posted: Fri Feb 02, 2007 5:58 pm I am laid up at home and off work for at least another month. I need something to do - so...... I decided to start a garden blog. I have plenty of time to dream about what new and exciting plants and seeds I want to add to my garden. Mostly I like old-fashioned plants and herbs. Perennials are the best and annuals that freely self-sow, such as Borage and California Poppies. Hopefully my next blog entry will be more scintillating. This blog entry has been viewed 648 times
You're reading one of many blogs on GardenStew.com.
Register for free and start your own blog today. |
Archives
All Entries |
